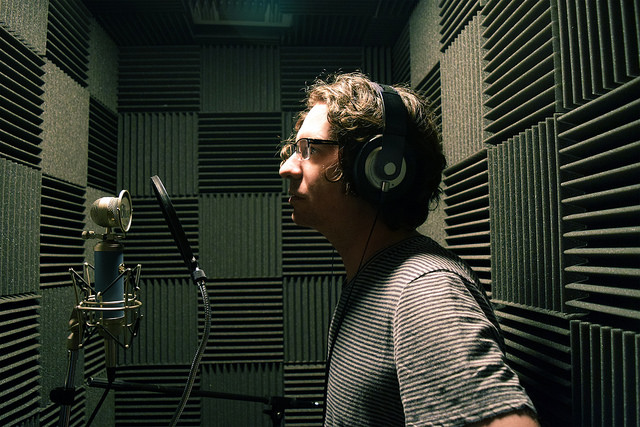
 Vocal tracks are a big deal. No matter what style of music you’re recording, if it has singing, the vocals are going to be the focal point of the composition. And that can be frustrating for artists recording in home studios.
Most likely you don’t have the option of running out and dropping thousands of dollars on high-end studio mics and a really great preamp. But you might not be as out-of-luck as you think. There are a lot of ways you can get better results when recording vocals, no matter how crummy your gear is. And you should be doing most of these techniques anyway, even if you’re blessed with great equipment.
Here are some great ways to get better vocal tracks from your home studio.
Make the Most of Your Voice
It always makes sense to start with the sound source. The better your singing, the better your vocal tracks will be. Period. Yeah, you may not have a virtuoso singing voice, but at least be sure you’re making the most of your abilities.
Start by knowing the song. Every nuance. Every word. Ideally you should get to the point where you don’t even need to have a lyric sheet in front of you. Even the split second it takes to find your place on the page can cause a bumble in your singing. You may not realize you did it when you recorded the track, but that slight lapse will probably be noticeable when you go back and listen to it afterward.
By knowing the song 100% by memory, you free your mind to interpret and express it more fully. This can make a big difference in the power of your performance.
Also, take care of your body. Unlike guitarists, drummers, and keyboard players, your ‘instrument’ is permanently attached to that bag of bones that’s been partying too long, sleeping too little, smoking too much, and not drinking enough water.
Would you neglect and abuse a $10,000 guitar? Doubtful. And your voice is far more valuable than that pricey axe. So treat your body accordingly.
And while you’re at it, study vocal technique when you can.
A lot of artists fear that studying traditional voice-training methods will turn their singing into syrupy opera. But nothing could be further from the truth. Learning proper breathing, muscle relaxation, voice placement, and other proven techniques opens up possibilities even for singers of the harshest, screaming rock styles.
 Gain Staging
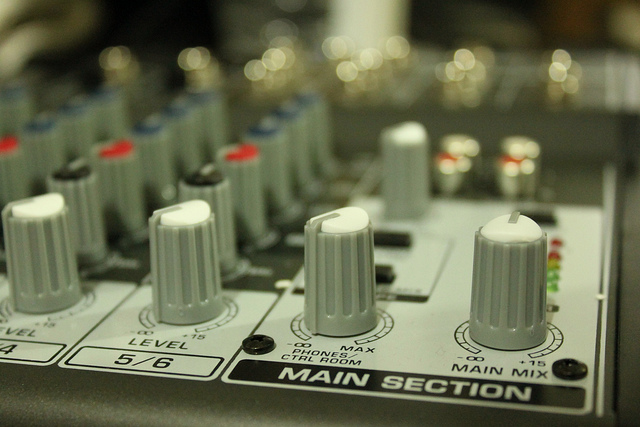
Once your voice is in decent shape, make sure your equipment is set up effectively. Even the best gear can sound bad if you’re not using it properly. The first thing to check is your gain staging. If you’re not familiar with the term, it simply means getting the volume levels at the most effective point as the signal travels from the microphone into your DAW or recorder.
If your levels are set too high, you’ll overload your preamp and cause clipping, which happens when the signal strength exceeds the recording device’s ability to capture it. On digital recording setups, this causes the sound’s waveform to get chopped off abruptly at the top.
Clipping sounds terrible. It’s the harshest, most unmusical form of distortion. And you can’t get rid of clipping once it’s recorded — it literally ruins the track in most cases.
So before you start recording any vocal tracks, take the time to check your input levels. Sing through the entire song exactly how you plan to record it, paying particular attention to the loudest parts. Then set your input levels to peak no higher than -15 on your DAW’s meter.
And you shouldn’t EVER see the red light on the meter. If you do, you’re not even close to the right input level. Bring it way down.
Also, keep an eye on the meter as you change your setup and try different things. Many of the techniques recommended in this article can significantly alter input levels. It’s easy to get absorbed with other issues and not notice that the meter has crept up too high.
Room Considerations
The space you’re recording in can have a huge effect on what your vocal tracks sound like. In fact, the sound of your recording space should dictate your whole approach to recording vocals.
If you have a spacious, great sounding room to work with, you can use recording techniques that incorporate that vibe into your tracks. Conversely, if you have a small, dull sounding space, it’s usually most effective to completely eliminate the room sound from your recordings, and then add a sense of space artificially using reverb or delay after you’ve recorded the tracks.
Both approaches can yield terrific-sounding recordings. It’s just a matter of choosing the right one for your particular studio.
If you’re lucky enough to have a rich, beautiful sounding room to work with, you can go any way you want with it — use the room sound, eliminate it and go artificial, or combine both methods.
Most home studios, however, aren’t so fortunate.
Instead many artists record in small rooms with lots of unpleasant reflections, comb-filtering issues, and bass-buildup problems. Yes, there are things you can do to fix or minimize these negatives. But in most home-recording situations, you’re still better off just eliminating the room from the equation as much as possible.
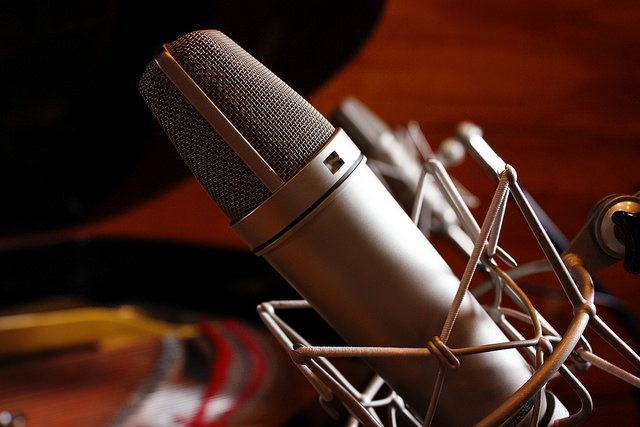
If you have a good choice of microphones, look for one with a tight pickup pattern. That means it doesn’t register much beyond a few inches past the end of the microphone, thereby keeping most of the room sound out of the track.
Also, consider getting an isolation panel that attaches to your microphone stand. These setups typically consist of some kind of thick sound insulation attached to a curved backing, mounted behind the mic. They can do a lot to trap the sound waves of your voice and keep them from reverberating around your room and spoiling your tracks.
 Position
Another element that can have a huge effect on your vocal recordings is the singer’s position. The most important of these factors is your distance from the microphone. Most mics have some proximity effect, meaning your voice will have a thicker, more bass-heavy sound when you get closer to the mic.
For people with a dense, bottom-heavy voice, this enhanced low-end could be a bad thing. But for those with a thin-sounding voice, it could be a good thing. So you’ll need to experiment with it on your own. Start by singing about six to eight inches away from the mic and work from there until you arrive at the best sounding position for your voice and the overall needs of the song.
Also, try different angles. Every microphone design has its own unique polar pattern. This means they can sound significantly different by singing at an angle to the mic. By aiming your voice a little bit across the mic in this way you can also cut down on sibilance (harsh ‘s’ sounds) and plosives (bursts of air).
Pop Filter
On the subject of plosives and sibilance, if you’re not already using a pop filter, go get one. These handy devices mount to your microphone stand and position a screen in front of the mic with a flexible mount. Basically, they allow sound to pass through, while blocking bursts of air that can mar your vocal tracks.
Like most audio equipment, the price of pop filters varies a lot. You can get a basic fabric filter for around $25. From there, you can move up to higher priced devices with heftier mounts, different screen materials, and other esoteric variations.
Different materials for pop filters can have slightly different sounds. Metal-screen pop filters are said to have a brighter sound than fabric screens. But some singers and audio engineers claim metal screens can introduce unpleasant artifacts. Foam-screen pop filters are said to not have this problem, but they’re rather pricey.
All that said, the differences between various types of pop filters are usually smaller than you’ll encounter with most of the techniques listed here. So you should probably exhaust all the other possibilities for improving your vocal sound before you drop $150 on a fancy pop filter.
 Shock Mount
Along with a pop shield, you should have some kind of a shock mount for your microphone. Without one, you’re likely to get annoying thumps or rumbles when you shift your weight on the floor or brush a cable against the stand.
Shock mounts are those spikey, spider-web-looking contraptions you’ve probably seen on mics in recording studios (shock mounts aren’t used in live performances).
Shock mounts function by eliminating the hard connection between the stand and the microphone. They generally do this by mounting the microphone in a zig-zagging strand of elastic cord stretched over the frame of the mount.
These relatively simple devices have huge price ranges. It’s generally best to look for one that’s specifically designed for your make and model of microphone, but sometimes they can be extremely costly. In those cases it may make sense to look for a universal-fit alternative.
And before you lay out any cash at all, double check the specs on your mic; you may not need to buy a separate shock mount after all. Some microphones are designed with internal shock mounting, which could be adequate for your needs.
Microphone Settings
Many microphones have built-in switches that allow you to tailor the mic’s sound somewhat. The most common settings are low-cut, pad, and high-end boost.
For singers with a bass-heavy or muddy-sounding voice, the low-cut switch can help the sound by rolling off some of the bass in the signal. This can be helpful, but it’s worth noting that the feature is essentially the same as EQing the sound in your DAW — except that you can’t ‘undo’ it later like you can with an EQ plugin.
A pad switch simply attenuates the overall level of the signal. This can be handy for loud singers. The pad feature prevents overloading the mic, preamp, or audio interface.
High-end boost amplifies the signal’s upper-mid and high frequencies. This can give some voices extra sheen and help them sit in the mix better. But again, you can accomplish the same thing with EQ and/or an exciter plugin, with the added benefit of being able to undo it later.
Preamp
Although the microphone is one of the most important components in getting a great vocal sound, don’t ignore the rest of the signal chain. In particular, pay attention to the preamp.
A lot of home studios use their audio interface’s built-in preamp for recording vocals. But the sound quality of preamps found in audio interfaces varies tremendously. For example, high-end audio interfaces are often equipped with preamps that rival those of the best recording-studio consoles.
Most home studios, however, don’t have the luxury of a high-end interface. Instead, there’s a good chance you’re using one in the $100-$300 range. Interfaces of this price point tend to have mediocre preamps. They may not sound noticeably bad, but they probably aren’t doing anything to the sound that will give you goosebumps. Same for hardware mixers typically used in home studios.
It may seem extravagant to spend $500 to $1000 or more for a piece of gear that’s somewhat redundant to your audio interface. But a high-quality dedicated mic preamp can lift the quality of your vocals more than you might imagine. In some cases, a good preamp can make even the cheapest mics sound pretty impressive.
Be Patient … and Realistic
It’s definitely possible to get home-studio vocal tracks to sound great, even using bargain-basement equipment. But it generally takes more work and more attention to detail than it would in a well-equipped high-end recording studio.
And even after all that work, you still might only get to 90% of the quality of your favorite artist’s professionally-recorded studio tracks — that last little bit can be a maddening pursuit indeed.
But don’t let it make you crazy. If you even get close, take stock of the fact that pro vocal tracks are typically recorded in studios that charge as much per hour as your whole recording setup cost. An d those studios are generally staffed with professionally trained engineers who’ve been recording in that same great room, using the same top-quality gear for hundreds of different recording projects.
Put decent singers in that situation, drop a $50,000 selection of mics at their disposal and odds are pretty good they’ll get results that will exceed your home-grown efforts.
Remember that. Why else would artists spend the time, money, and inconvenience of leaving their own home studios to record?
And even with all those advantages, the pros still have to work hard to get great vocal tracks — veteran producers in the world’s greatest studios go through the same steps detailed here when tracking vocals. So no matter what kind of recording setup you have, capturing great vocal performances is a journey. But you can get there faster and more consistently with these techniques.